Food for the kiddos

Food for the kiddos
Showing posts with label cute food. Show all posts

Monday, 16 October 2017

Sandwich Making Workshop+ Step By Step Tutorial (Little Gal Sandwich)

Goodness! I realized I have not been updating my blog for almost 6 months! On and off I did make sandwiches but didn't bring myself to post on the blog. I was also recuperating at home last month . Excuses! Excuses! Excuses! Finally got myself to sit in front of the PC to update my blog. Thanks to the motivation as a trainer for the recent sandwich making workshop. I was so excited to conduct a sandwich making workshop last week. 2 wonderful friends came and helped me with the workshop, if not, I wouldn't be able to cope on my own. I enjoyed myself and the participants had a great time too! I did a Step-By-Step course note for the workshop and now I will share it in this post. Let's take a look at a few pictures of the workshop before I share the course notes for the workshop.
 
 
There were more than 30 participants but my fingers were not fast enough to take picture of all the sandwiches! They all did an amazing job!!! Bravo!!!
 
The Beginning. Nope, I was not going for a vacation. My barang barang for the workshop was so heavy that I had a hard time getting the stuff to the office premises.
Doing the demo.


I was quite happy that the turnout was not 100% ladies.  Who says men cannot make cute sandwiches?My buddy that came all the way to help me with the workshop!!! Feel the love! Don't scold me, buddy...but I don't have the time to edit our picture.
Now the tutorial.....
 
Step By Step Tutorial for Little Girl Sandwich
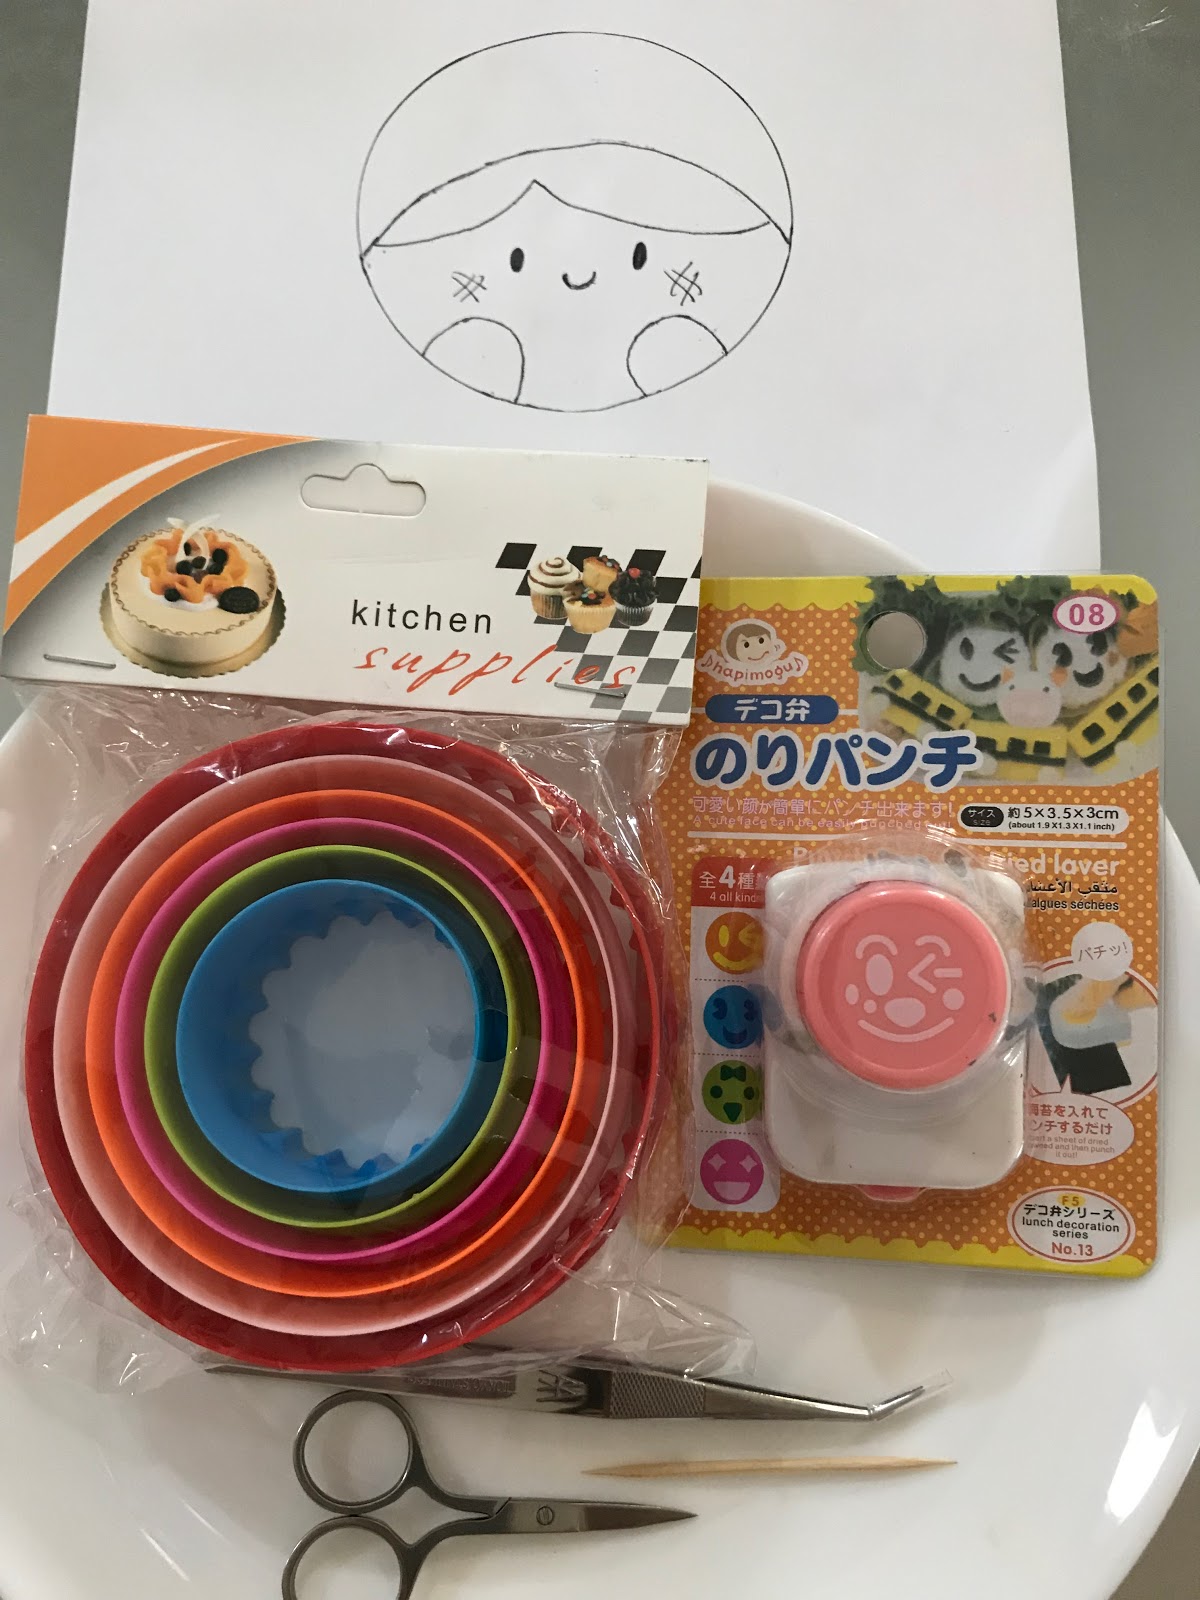
Tools Needed –
Round Bread Cutting Mold
Seaweed Puncher
Tweezers
Scissors
Toothpick
Butter knife


Ingredients –
2 Slices of Bread (preferably white bread)
Strawberry Jam
Dried Seaweed (Nori)
Mayonnaise
One slice of Cheddar Cheese
Half a slice of White Cheese


Step 1 - Cut out the parts of the drawing as shown.

Step 2 - Spread the jam in the center of bread. Go light on the sides to avoid a ‘bleeding’ sandwich.
Step 3 - Use the round mold and cut the bread.
You should get something like that.
Step 4 - Using a toothpick, trace the outline of the little girl’s hairband on the cheddar cheese (with the plastic covering).
Step 5 - Remove the top of the plastic covering and run over with the toothpick again.
You should get something like that. Place it on the bread.
Step 6 – Place the hair of the little girl over the nori and cut out the shape accordingly.


Step 7 – Punch the expression using the seaweed puncher. Dab some mayonnaise and place the eyes and mouth on the bread as shown.

You are free to express yourself.

You will be able to create different expressions using just one seaweed puncher. Inverted mouth makes a sad expression.


Step 8 - Using a toothpick, trace the hand of the little girl on the white cheese (similar to Step 4&5). 
Step 9 - Place the white cheese on the bread.
Step 10 – Dab some strawberry jam on the cheeks as blusher.
Step 11 – Add a bow or any decorations on the head.


 The little girl is supposed to be holding a flag holding the company's logo but I shall not post the picture with the flag here.

'Moon Cake' Tutorial (Super Easy)

I know, I know...Mid autumn festival is over for weeks and now I am posting this tutorial. Well, I was too caught up with work and didn't had the time to post. Better late than never (at least that's what I tell myself).

This is the simplest tutorial I can think of as long as you have the mooncake mold.

It looks very much like a mooncake except that it is a sandwich!!!
As I said, it is a super easy tutorial if you have the right tools. Using the top brown piece of bread, use the round cutter and cut out the bread.

Next, use the mooncake mold to 'print' on the bread. Yes! it is that simple!

You should get something below.

I used 3 slices of bread(including the top brown slice) to give the bread height of a mooncake. YOu can add at fillings you desire.

Finally, I added a piece of 'zhu zai' to the box. Platter up with fruits and it is ready to go.
Mooncake cheats! Hahaha...

Saturday, 22 April 2017

Rabbit Sandwich 2017 Tutorial (Level : Difficult)

When it comes to cutting seaweed for sandwiches, I will always put the level as difficult because it requires a lot of patience and care. The seaweed will be thin and flimsy, easily breakable at times and you need to be careful when handling the cut out seaweed pieces.

Tools Required -
1. A pair of sharp scissors
2. A pair of tweezers
3. A small straw
4. A butter knife

Ingredients Needed -
1. Two slices of bread
2. Breading filling of choice ( ham & cheese for this tutorial)
3. Dried seaweed
4. A dab of strawberry jam
 
I always make the sandwiches using the same method. Find a picture, draw the picture on a piece of paper and cut out it. For this sandwich, I used the cut out as a guide to cut my bread to the same shape. You can use the scissors or the knife to cut out the shape, whichever more comfortable to you). After that I used the dried seaweed and painstaking cut out the seaweed to form the outline of the rabbit, including the eyes and nose. I was so busy cutting and placing the seaweed that I forgot to take any pictures. My bad!
 
As shown in the picture, I used the straw (in red) to make the round dot on the rabbit's eyes.  
Finding the cheese was too thick, I cut it into halves and placed it on the rabbit's eyes.

Once you are done, you should get something like that.

As the bottom slice of bread need not be so precise in shape, it was only a very rough outline and you couldn't even see the bunny shape. Just need to use scissor or the knife to trim the bread to get the shape.
Place the ham and cheese between the bread and trim away the excess like what you did for the bottom slice of bread.
Pointers to Note : I do not like to throw away food so I put the excess bits back into the sandwich

I added some cheek colors to the rabbit using some strawberry jam. You can use the butter knife to do it but I used a chopstick to dab the 'blusher' on the rabbit instead.
I have added two quail eggs, sauce and some fruits to the box.
This should be your completed work!
Have a great day ahead!

Rabbit Sandwich 2017

I didn't make sandwiches since the start of school this year and is getting abit rusty. I have started on a part time job and need to spread out my time but nothing can be or should be more important than the well-being of my children. They were sick some weeks ago and lost some weight. I really need to pump them up with food.

I volunteered to let them choose a design from my sketchbook and the elder one chose a rabbit. She is going crazy over rabbits these days but I really cannot let her keep a real bunny at home. Well, a bunny sandwich is the least I can do.

I made their favorite ham and cheese sandwich yesterday and filled the box with quail eggs and fruits.
It is quite tedious to prepare the sandwich as I have not been touching my bento tools for months. The kids were so happy that I am making sandwiches for them again and their friends gathered around them to admire their sandwich during recess. Well, anything to make my kids happy.

I will share the tutorial for this sandwich in the next post.
 
Happy weekend, everyone!

Wednesday, 4 May 2016

Seal Sandwich Tutorial - Easy

It has been almost 2 months since I made this seal sandwich for the kids. Finally, I get to sit down and share the tutorial on this.

To make the seal sandwich, you will need the following :

Tools -
1. A pair of tweezers
2. Teddy bear sandwich mold
3. Round bottle cap
4. Seaweed puncher or a pair of scissors

Ingredients for a seal sandwich -
1. 3 slices of bread
2. Dried seaweed
3. A slice of cheese
4. Strawberry jam


I used a teddy bear sandwich mold for this seal sandwich as shown in picture below.

Using the ears of the teddy bear mold, I pressed out 2 circles of bread for the fin of the seal. You can use any other round shaped cutter available at home, such as a medicine bottle cap (the pink cap I use to cut the cheese for this tutorial). 

Using a slice of cheddar cheese, I cut the nose of the seal with a medicine bottle cap 

I used a seaweed puncher for this but you can cut out the same shape using a pair of sharp scissor. The seaweed puncher is not a must to have but it does save you a lot of time. 
Lastly, apply blusher the the seals using strawberry jam as shown in the picture. 
Ta-dah! The sandwich is completed. 

Wednesday, 9 March 2016

Seal Sandwich

My kids wanted a Mamegoma sandwich and I made it last Monday for them to bring to school. I was too busy to upload the pictures with a tutorial on it.

I saw a similar sandwich somewhere but decided to create my own since it is not the first time I made a Mamegoma seal sandwich. 

I will share the tutorial on this sandwich in another post.

The kids were happy to have cute sandwiches again!

Wednesday, 24 February 2016

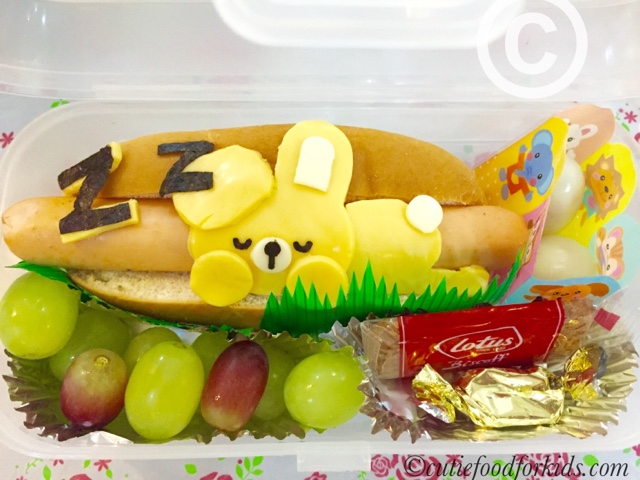
Sleeping Bunny Hotdog Bun

Good Wednesday morning! 

After bringing mummy-made sandwiches to school on Monday, the kids' classmates commented that finally the mummy is making sandwiches again. Humm…did they miss seeing the cute sandwiches?

Possible ideas for the buns
I don't make hotdog bun for my kids very often but since I got some Ikea hotdog at home, I decided to make good use of it. I made a sketch of several possible designs for the bun and the kids unanimously voted for the sleeping rabbit. My personal favorite is the rabbit and cat friend but my customers are always right. Sleeping rabbit it shall be. 
My rabbits did not turn out exactly the way I sketched. I left out the 'blush' on the cheek because there wasn't any more space with the paw blocking the face. I added a small circle to the nose as the initial design was too simple. 
I made each rabbit using only one slice of cheese. Each kid wanted a different colored rabbit so I made use of 2 slices of cheese, Mozzarella cheese and Cheddar cheese. I used a rabbit head mold for the head and a toothpick to curve out the rabbit's body on the cheese. 

Not sure which is cuter but the yellow rabbit is definitely fatter than the white one. I was running out of mozzarella cheese and didn't want to use another slice. Hehehe…
Apart from the bun, I added grapes, quail eggs, a small biscuit and a candy to go along.

The final product of 2 sleeping bunnies! 

I hope the kids can finish everything in the box!