Food for the kiddos

Food for the kiddos

Wednesday, 8 April 2015

Super Easy DIY Foodpicks Tutorial

I made a few heart-shaped foodpicks for my kids sandwich box yesterday. They are super easy to make and thought I should share the idea of making simple disposible foodpicks.

STUFF REQUIRED (all shown in the picture below) :
1. Colored paper of your choice (IMPORTANT NOTE : do not use those colored paper that color will run after contact with moisture!)
2. A pair of scissors
3. Double sided tape
4. Toothpicks

*Tip : You could also use those leftover free wrapping paper from the shopping malls instead of buying colored paper! Just make sure it's clean :)
STEPS : Cut out a rectangle and fold into half. Paste the double sided tape to one of the square(blank side) and insert the toothpick in the middle of the square. Fold the other side of the paper to stick on the tape and you will get a square. Cut into heart-shapes as shown in picture.
And you are done! In this case, I used the heart-shaped foodpicks as fishtails in my kids' sandwich box. 
There is no limit on the shape, colors and size for the DIY foodpicks. It really added colors to the sandwich box since I do not use artificial food coloring for my kids' food.

Let your creative juice flow! Try it out!

Tuesday, 7 April 2015

Mamegoma The Seal


Mamegoma the seal was once my kids' favorite. They loved the plush toys, the stationaries and everything about Mamegoma that I even made a sandwich for them. I decided to make it again using cheese this time and just put on the bread in the morning as I needed more time for the quail eggs.


They are just so cute!
As I said, I needed more time for the quail eggs as I wasn't able to prep them in advance. I made the heart-shaped foodpicks and used them as the fish tail. It is really simple to make. I will share the tutorial on how to make the foodpicks in another post. 

I cut the seaweed in the morning and 'glued' the seaweed to the egg using mayonnaise. To be honest, it was abit time consuming to make six 'fish'. I should have made four instead.  
As promised, today's sandwich box is much more colorful than yesterday's. Colored fish tails, colored food divider and the red strawberries added colors to the box. The white bread is my canvas and I just need to put the Mamegoma cheese on the bread.


The two sets for my two kids. I am sure they will gobble up their food today. It's been a long time since they last saw Mamegoma. Time to take out the Mamegoma plush toys!

Monday, 6 April 2015

Which Bunny is Cuter?

Which one is cuter?
It is so late and I almost forgot to post the sandwich I made today. I made the rabbit cheese last night so that I could just put on the sandwich with no fuss the following morning. 

Using a mould to cut the shape of the rabbit, I used white cheese for the nose. There were two different expression for the same rabbit. 

There is a new bottle of crispy chocolate jam and the kids loved it! I cut away the sides of the bread and add the jam to the bread, slap on the rabbit cheese and off they went. 
I didn't add a lot of colors to the box today and totally forgot that Easter is over! I kept telling my kids to bring the chocolate Easter eggs to share with their friends this coming Friday! Gosh! I will make sure they bring tomorrow to share instead!
Their sandwich box is completed with quail eggs(if not where do I get an empty quail egg case for my previous post on the DIY Easter gift?) soaked in dark soy sauce and fruits.

I could have added more colors to the box using color food dividers or more colorful fruits. Just getting lazy.

Shall do a better job tomorrow! Hee….

Sunday, 5 April 2015

DIY Easter Gift - Easter Choco Eggs Deco Fun


Today I decided to have some fun since Easter is coming. I bought a pack of Easter chocolate eggs with the intention of adding to their Easter theme sandwich box and there are just too many in one packet. Sharing is more fun so I decided to let them bring some to school and share with their classmates.

I gave the kids some stickers and let them create some polka dots eggs. I have many other types of stickers too but I just want to keep the task simple.
Work-In-Progress
Task Completed
They had lots of fun putting the stickers and it is a pretty yet simple gift to make for your friends. 


Below is the list of items you need for the DIY Easter Gift.

Stuff Required :
1. Empty Quail Egg Case
2. Small Chocolate Easter Eggs
3. Assorted Sitckers
4. Ribbon to tie the box (optional)

It is fun. Give it a try it!

Thursday, 2 April 2015

Quick & Easy - Sandwich Bag

I have to admit I don't feel like making cute sandwiches this week but my kids still need their food. Sandwich bag is the easiest as I am free to decorate the bags. Too lazy to even make sandwich, I bought some buns from a bakery and put into colored sandwich bags. 


Added their favorite stickers to the sandwich bags instead of drawing on it. They are not really into Disney Frozen anymore (what am I gonna do with the hand drawn Elsa sandwich bags now? *sweat*) and one of their new favorites is the Winx Club. I just added a short message on the bag for a personal touch.

They seem happy with the arrangement as they get to choose the stickers for the bags too.  

WIN-WIN situation! :)

Wednesday, 1 April 2015

Starry Starry Sandwich

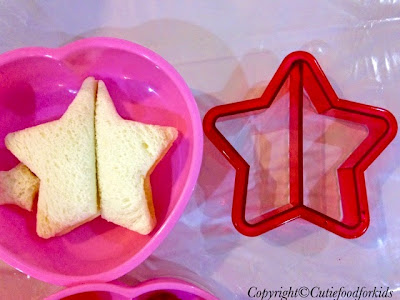
Star-shaped sandwich cutter
Feeling lazy to make a character sandwich today and so I dug out a star-shaped sandwich cutter from the cupboard. This cutter was a free gift that came with some milk powder for my kids. It has been with me for quite some time and finally get to use it today. 

I used kaya and butter for the bread filling. I also included dried apricots and fresh strawberries for the kids, not forgetting their favorite cookies. I reminded them to share the cookies with their friends, if not there will be a sugar rush!

Their sandwich boxes today!
It only took me less than 10 minutes to fill up the box. Quick solution for a lazy me!  I just hope I don't get too used to it. Hehehe…

Tuesday, 31 March 2015

Piggy Piggy Pig Pig

I saw a cute piggy soft toy and made a sketch of it. I tried to make it into a piggy sandwich but the sandwich didn't turn out to be as cute as the drawing. Room for improvement!

My kiddo actually told me it a difficult sandwich to make but I told her at least I tried.

I used ham and cream cheese as the bread fillings and from the sketch, i labeled the rest of the ingredients used in the picture.
The initial drawing was adorable but I think the nostrils of the sandwich is too prominent and so the sandwich didn't turn out the way I wanted. I guess I should have dug two holes on the snout to create the nostrils instead of using white cheese. 

Anyway, it was done and I didn't had time to change. So be it! As long as my kids eat everything in the box. Hee…